See the second attempt here
Tartine Bread
I still remember the first time having Tartine bread. The parking at Mission district is ridiculous I had to circle around while my wife went to the bakery to buy the bread. We were lucky we got the bread that day, because since then, the breads were always sold out. We were on our way to dinner with friends, but the aroma of the bread was so good that we could not resist tearing a piece to try, and we could not stop. Having lived in Ottawa and frequent visit to Montreal, I think I know what great bread tastes like, and this is one of the best breads I ever had.

I was so excited to see Tartine Bread book by Chad Robertson. This book describes the process of baking Tartine country bread. First hour into reading this book, I was set on a mission to try it out. Following the advice in the book, I ordered the Lodge pre-season combo cooker from Amazon and highly recommend this for baking Tartine country bread recipe.
I was having some trouble with Chad's book. Although I like the book very much, I found some of the detailed information was lacking. As a home baker trying to use wild yeast for the first time, I had to look up so much information from the Internet, and this website, The Fresh Loaf, came to my rescue. So, I am hoping this blog below will be useful for whoever the first timer that is trying to follow the recipe in Tartine Bread.
Some background - I am a casual baker. I bake mostly pizza and foccacia, some brioche, in the past with very good success. I have had the book, Bread Baker Apprentice, for a few years but never really tried any of the hearth bread recipe because I was afraid to deal with steaming my oven. I also heard many horrible story about things that could go wrong and costly repair. Chad's method calls for cast iron combo booker which, in my opinion, makes perfect sense. I am not hesitated to try it out.
 |
| Lodge combo cast iron cooker at Amazon |
Making the starter
This book calls for making your own starter by mixing water and 50/50 white and whole wheat flour. I went for the King Arthur flour which I had very good success with. I started my starter on Dec 30th. By the 3rd day, there should be some activities. But in my case, by the end of the 2nd day, it looked spoiled, kinda black and something like mold on the surface. However, the underneath seems to be just like what Chad describes in his book. I decided to give it a go. Any mole will not survive 500F in the oven once it is baked anyway. I scraped off the surface and threw away and kept just enough of what was underneath to start my feeding.
Week 1
Initially, I did my feeding in the evening, even though the book recommends morning feeding, because of my work schedule. After a few days of very little or no activity, I switched to morning feeding. I kept checking on the starter like once every hour when I was home, and my wife started to think I might be crazy. We finally named our starter after Mr. Chad for good luck (hopefully he will not be offended). My starter weighted about 150 grams, and every morning I would discard 120 grams into the trash. Then added back 60 grams of 80F water and 60 grams of 50/50 flour mixture.
Week 2
Just to start the week, we went to pick up a loaf from Tartine just in case my attempt to bake this blew up. At least I can still have good bread next week. I continued to maintain my feeding schedule even though there was little activity. I started to get used to the routine. My excitement also started to diminish as I was not sure if this thing was still alive. Looking around on Internet I came across another blogger named Sarah and did ask her a question. Nice enough she gave me an answer I was looking for. Her starter came to life in about 10 days. This is one thing about this book. It does not really tell you how long it will take so you will have to be patience. So, I decided to continue for another week.
Day 10
Thing totally changed on this day. I woke up to do my daily feeding to discover my starter already doubled. Yes!!! This is what I have been looking for. You just gave me hope. The black line below was the level when I started the feeding and look at where it was 24 hours later.
 |
| Starter in the morning of the 10th day |
After calming down my excitement, I proceeded with the daily feeding and hope for the best.
 |
| Starter right after feeding. The black line is the starting level. |
 |
| 20% increase by the end of the day. |
After the 10th day the starter seemed to be very alive and had quite predicable routine. It doubled by the end of the day and fell by the next morning for the daily feeding. Two weeks into making the starter, I think it was ready.
Making the leavening
Friday night, I started my leavening and hoped for the best next morning. The book indicates it should increase about 20% in volume the next day. I woke up and found this thing doubled in size. Wow, it was going very strong.
 |
| Making the leavening |

 |
| Leavening the next morning. Just double in size. |
Making the dough
I proceeded with mixing the dough by hand. I started with a stainless bowl which turned out to be too small and then a glass bowl that felt very fragile when I rotated. In the end I found that 5qt Kitchen Aid bowl worked really well. After fighting with the dough for 10 minutes, I let it rest in the glass bowl.

The next step is to start the bulk rise. The bakery uses the proofing box. I did find one at local Sur La Table for about $20. Holy crap! Just for a piece of plastic can cost that much. Improvise I thought so I found a plastic snapware from Costco that my wife has and decided to use that. It was the perfect size and worked well for this purpose. I covered the box with kitchen towel to block draft and put that in the oven with the light on as that gave the temperature close to 80F. I proceeded to do the turns and rest for the next 3 hours while using my oven (with light on) to control the temperature.
 |
| My improvised dough proofing box |
 |
| First hour, not much bubble yet. Lot of bubbles by the end of 3rd hour. |
Shaping the dough
After 3 hours and 15 minutes, it looked ready. A lot of bubbles were seen and the dought was very aerated. I took it out to start dividing and shaping. I also used Roul-Pat which is the kneading silicone mat to prevent sticking and found that it worked really well.


Now I proceeded with shaping the dough into round shape. This was the first time using bench knife and handling a dough this wet (I have only messed with pizza dough and that was nothing compare to this dough). After some wrestling, I finally was able to round it up into two balls.

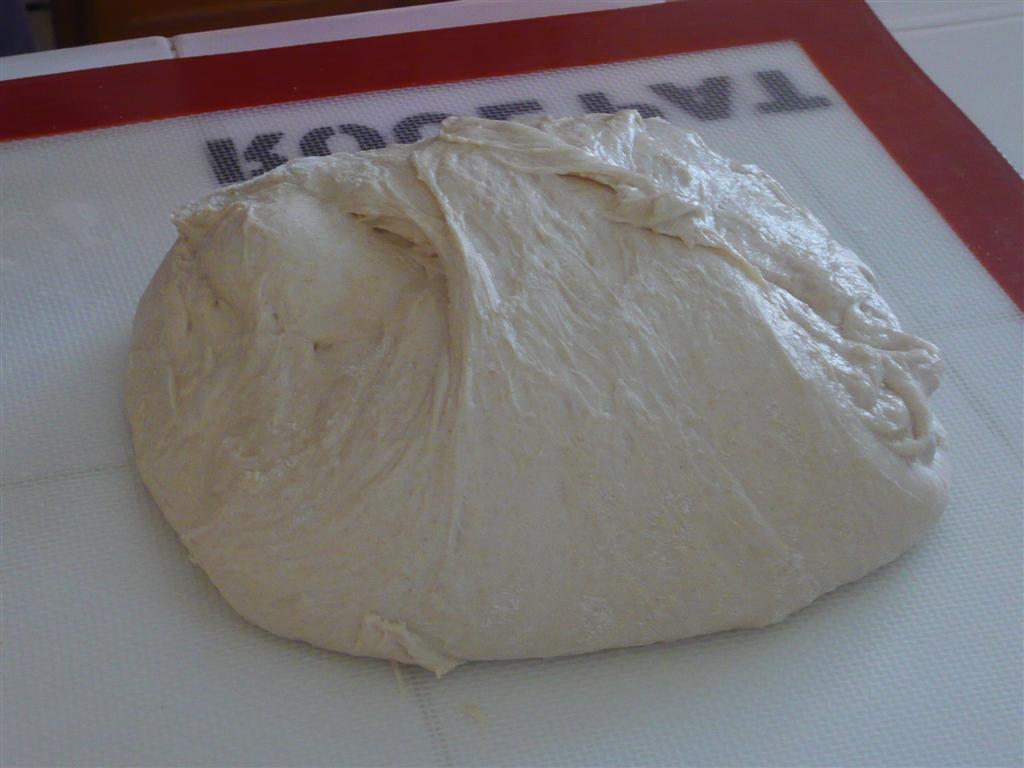


Whoala, now dusting my again improvised brotform proofing basket and just put the dough in for final rise. And this is where I messed up real bad. I did not dust enough flour. At the time I did not realize but we will see what happenned in the baking section.


Now to the baking.
Baking
I put the combo cooker in the oven and then turned it on to preheat to 500F. I think this is better so the cast iron gradually heat up. It took about 20-25 minutes to come up to the temperature, and do not totally trust your oven thermometer. Mine had about 5 minutes lag for the real temperature to come up to what the oven indicated. Moment of truth, I took the skillet from the oven and tried to flip my basket to get the dough out. Oh crap, it stuck. Damn me for not dusting enough flour. I had to ask my wife to help holding the basket upside down while I carefully scraped the sticking dough into the skillet. I was also having a hard time scoring the bread which I was not sure if it was because of not enough tension. The dough seemed so relax that the razor just could not cut into.
 |
| I think the dough is a little overproof. |
After some struggling, I finally got the bread in the combo cooker, close the lid and was patiently waiting, finger crossed of course. It was a very long 20 minutes as I could not see what was going on inside that combo cooker. 20 minutes later, I opened up the lid, the bread did rise a little bit more, but not popped as I would expect. It could be my poor (first time) scoring skill too.

End Result
However, this story has a happy ending. The bread came out quite good. Given my issue with getting the bread out of the basket, this is considered success. The instruction calls for wait for the bread to cool down, but NO WAY, I could wait no more. I am sliding it up baby.
The bread was awesome - chewy with nice and crispy crust. I made that? I still could not believe it. The second loaf also came out really nice too, although not as popped as the first one. I can say this tastes much better than many breads I have bought, but as good as Tartine's? Hell no but IMHO, it is very close. This is still way above and beyond my expectation. After 2 weeks of waiting, I finally got to taste my own bread, and it is my proudest moment. My wife had to remind me not to be dramatize about it. This one has less sour flavor than the Tartine bread we got a week ago.
My wife helped taking these pictures and rescued the sticky dough out of the basket.
 |
| I made that? |
 |
| Cannot wait for it to cool down. |
 |
| Look at the air pockets. |


Thanks for reading.
Well done brother!
ReplyDeleteAmazing!!!!!.. never thought of you doing this..
ReplyDeleteGood job!!!
Your bread looks amazing! Thank you so much for sharing.
ReplyDeleteI've been feeding my starter for four days now and I seriously cannot wait to bake some bread. I'm keeping my fingers crossed that all will go well.
@Stalene - thanks. Just be patient as mine took almost two weeks to mature - probably 10 days before start seeing any significant activities.
ReplyDeleteFor me, around day 10, after morning feeding, it doubled in volume by the evening. Then I gave it a few more days before using it. Good luck.
Today is day 1 of my starter! I will be posting on my blog about it - but as your first post this is great! good work... it looks delicious.
ReplyDeleteAly
@Aly - thanks for checking out my blog. Good luck with your starter. I tried this only twice so far and now my starter lives happily in the refrigerator with about 1.5 - 2 weeks between feeding. Cheers.
ReplyDeleteOhhh thank you for this! My starter got a weird watery mold on the top too and I was wondering if I should continue!
ReplyDelete